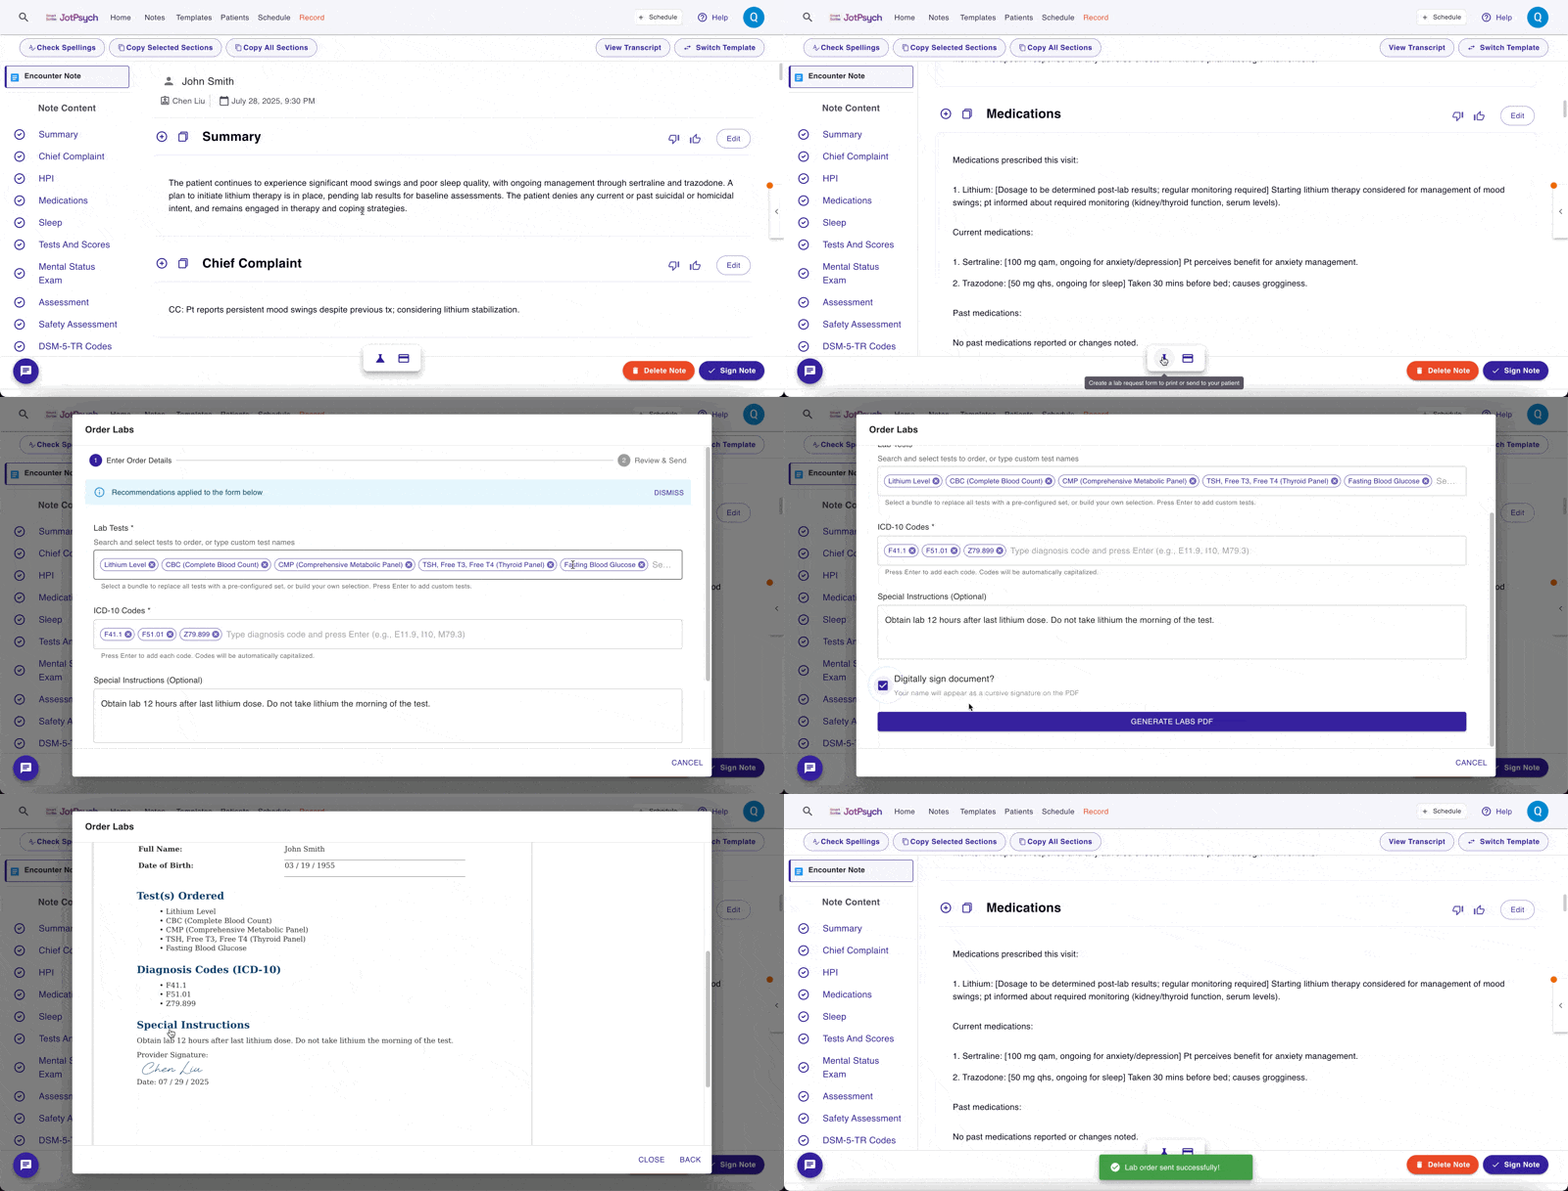
How to create a lab requisition form
Why create a lab requisition form in JotPsych?
Smart lab recommendations: JotPsych automatically suggests relevant lab “bundles” based on session content — like baseline labs for intakes or lithium monitoring panels.
Pre-filled details to save time: We auto-fill required fields including patient demographics, provider/practice info, ICD-10 codes, and special instructions (e.g., “draw 12 hours after lithium dose”).
Flexible delivery options: Download or print a clean PDF, or send it directly to your patient via secure email — whichever fits your workflow.
How to Create a Lab Requisition Form in JotPsych
You can create a lab requisition form in JotPsych in two ways:
From the floating action toolbar, available throughout the platform
Automatically after a session via an AI-generated action card
This tutorial walks you through creating a lab requisition form using the floating action toolbar.
Step-by-Step Instructions
Access the floating action toolbar
You’ll see this toolbar at the bottom of your screen when viewing a note, recording a session, or reviewing a patient profile.View the note after your session
Once your session is complete, open the corresponding note in JotPsych.Click the beaker icon on the floating toolbar
On the floating toolbar, click the beaker icon to start a new lab requisition form.Review recommended labs
JotPsych will analyze the session note and automatically recommend appropriate lab bundles (e.g., lithium monitoring, intake baseline labs). These will appear in the "Lab Tests" field.Customize lab orders as needed
Click the field to change or add tests
Choose from saved bundles, individual labs, or type in a custom test name
Edit or confirm diagnosis codes
JotPsych will suggest ICD-10 codes based on your note content. You can edit these directly if needed.Review special instructions
Common instructions (like “fasting required” or “draw 12 hours after lithium dose”) are auto-filled based on the selected labs. You can adjust these to match your workflow.Add a signature
If desired, check the box to have JotPsych sign the form for you — your name will appear in a cursive signature font.Complete any missing information
If required details (like patient date of birth or your NPI number) haven’t been entered yet, you’ll see fields to fill them in. JotPsych will save this information to streamline future forms.Generate the PDF
Once everything looks good, click “Generate Labs PDF.” You’ll see a preview of the finalized form.Deliver the form
From here, you can:Email the form directly to the patient
Download the PDF to your computer
Print a copy for in-person delivery

